是不是也曾经为编写CSS而苦恼,重复性的编写、存在兼容性等问题,接下来就分享下我是如何使用LESS快乐编写CSS的,让你事半功倍~
前言
在此之前你可能听说过或使用过LESS, Sass 和其他 CSS 预处理器,它们是一种超棒的方法用来扩展 CSS 功能,使之更适合程序员。你可以使用变量、函数、混合、继承等多种编程常用方法来编写 CSS,以更少的代码完成更多的样式。
关于LESS
如果你还没接触过 LESS,可以先行阅读以下教程:
LESS CSS中文官网:http://www.lesscss.net/article/home.html
或者对于选择使用LESS或者SASS有疑问:
Less介绍及其与Sass的差异:http://www.w3cplus.com/css/an-introduction-to-less-and-comparison-to-sass.html
组件分享
组件简介
基础组件包括:layout.less、reset.less(源码附后),接下来可在其他的less文件中引入这些文件:@import “include/reset.less”;即可,分成更多的模块文件,使结构更清晰。
编写技巧
layout.less:包含reset.css,及部分常用的兼容性代码,包括圆角、省略号、文本隐藏、阴影、渐变、折行等,一一介绍.
简单圆角半径 Borer-radius
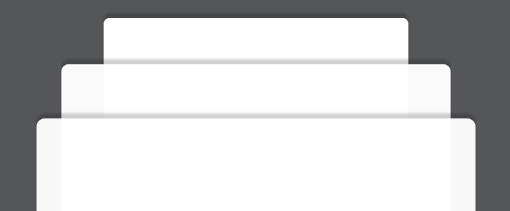
CSS3 一个非常基本的新属性可以快速的生产圆角效果,如上图所示。要使用 CSS3 的圆角效果我们必须针对不同的浏览器定义各自的前缀,而如果使用了 LESS 就可以不用那么麻烦。
下面代码使用 mixin 技术,通过定义 .border-radius 并接收一个 radius 参数,该参数默认值是 5px,你可以在多个地方重复使用该 mixin 方法:
|
1 2 3 4 5 6 7 8 9 10 11 |
/* Mixin */ .border-radius (@radius: 5px) { -webkit-border-radius: @radius; -moz-border-radius: @radius; border-radius: @radius; } /* Implementation */ #demo { .border-radius(20px); } |
将这个 less 编译成 css 后的结果是:
|
1 2 3 4 5 6 |
/* Compiled CSS */ #demo { -webkit-border-radius: 20px; -moz-border-radius: 20px; border-radius: 20px; } |
四角的半径定制 Radius
如果你希望用户可自由定制四个角的半径,那么我们需要对上面代码做下改进。使用4个变量分别代表四个边角的半径大小:
|
1 2 3 4 5 6 7 8 9 10 11 |
/* Mixin */ .border-radius-custom (@topleft: 5px, @topright: 5px, @bottomleft: 5px, @bottomright: 5px) { -webkit-border-radius: @topleft @topright @bottomright @bottomleft; -moz-border-radius: @topleft @topright @bottomright @bottomleft; border-radius: @topleft @topright @bottomright @bottomleft; } /* Implementation */ #demo { .border-radius-custom(20px, 20px, 0px, 0px); } |
编译后的 CSS
|
1 2 3 4 5 6 |
/* Compiled CSS */ #demo { -webkit-border-radius: 20px 20px 0px 0px; -moz-border-radius: 20px 20px 0px 0px; border-radius: 20px 20px 0px 0px; } |
文本超出显示省略号 Ellipsis
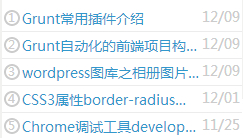
如上图,只需要给li设置width或者max-width,再给li加上.text-autocut这个class即可
|
1 2 3 4 5 6 7 8 9 10 |
.text-autocut{ overflow: hidden; white-space: nowrap; -webkit-text-overflow:ellipsis -khtml-text-overflow: ellipsis; -icab-text-overflow: ellipsis; -moz-text-overflow: ellipsis; -o-text-overflow: ellipsis; text-overflow: ellipsis; } |
内阴影 Inner-shadow
4个参数分别表示:x轴偏移、y轴偏移、模糊长度、透明度(默认颜色是黑色) :
|
1 2 3 4 5 6 7 8 9 |
.inner-shadow(@param1,@param2,@param3,@opacity){ -webkit-box-shadow:inset @param1 @param2 @param3 rgba(0, 0, 0, @opacity); -moz-box-shadow:inset @param1 @param2 @param3 rgba(0, 0, 0, @opacity); box-shadow:inset @param1 @param2 @param3 rgba(0, 0, 0, @opacity); } #demo{ .inner-shadow(0px, 0px, 10px, 0.4); } |
编译后的CSS
|
1 2 3 4 5 |
#demo{ -webkit-box-shadow: inset 0px 0px 10px rgba(0, 0, 0, 0.4); -moz-box-shadow: inset 0px 0px 10px rgba(0, 0, 0, 0.4); box-shadow: inset 0px 0px 10px rgba(0, 0, 0, 0.4); } |
外阴影 box-shadow
|
1 2 3 4 5 6 7 8 9 |
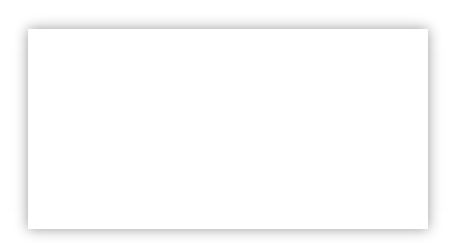
.box-shadow(@x: 0px, @y: 0px, @blur: 8px, @alpha: 0.5) { -webkit-box-shadow: @x @y @blur rgba(0, 0, 0, @alpha); -moz-box-shadow: @x @y @blur rgba(0, 0, 0, @alpha); box-shadow: @x @y @blur rgba(0, 0, 0, @alpha); } #demo{ .box-shadow(0px, 0px, 20px, 0.4); } |
编译后的CSS:
|
1 2 3 4 5 |
#demo { -webkit-box-shadow: 0px 0px 20px rgba(0, 0, 0, 0.4); -moz-box-shadow: 0px 0px 20px rgba(0, 0, 0, 0.4); box-shadow: 0px 0px 20px rgba(0, 0, 0, 0.4); } |
颜色渐变 Gradients
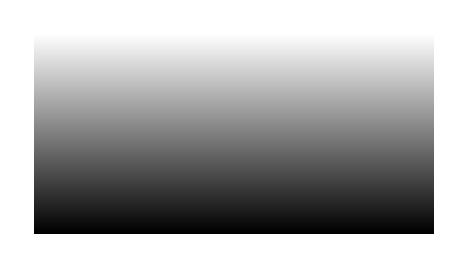
渐变是 CSS3 最复杂的属性之一,有上百万中不同的设置组合,但我们常用的无非几种。实现两个不同颜色之间的渐变,你可以定义开始颜色和最终颜色,这里我们使用最新的渐变语法,浏览器的支持情况请看这里。
第一个参数指定渐变的方向:top、left,第二第三个参数为起始和终止颜色,兼容IE7-11、chrome、FF等各大浏览器,不支持的取2个颜色的混合色,IE使用滤镜,因为LESS不支持滤镜写法,所以取值时需要加上 ~””。
|
1 2 3 4 5 6 7 8 9 10 11 12 13 |
.gradient(@origin: top, @startColor, @endColor){ background-color:@startColor/2 + @endColor/2; filter:~"progid:DXImageTransform.Microsoft.gradient(startColorstr='@{startColor}', endColorstr='@{endColor}')"; background-image: -webkit-linear-gradient(@origin, @startColor, @endColor); background-image:-moz-linear-gradient(@origin, @startColor, @endColor); background-image: -o-linear-gradient(@origin, @startColor, @endColor); background-image: -ms-linear-gradient(@origin, @startColor, @endColor); background-image: linear-gradient(@origin, @startColor, @endColor); } #demo{ .gradient(top,#FFF,#000); } |
编译后的CSS:
|
1 2 3 4 5 6 7 8 9 |
#demo { background-color: #808080; filter: progid:DXImageTransform.Microsoft.gradient(startColorstr='#ffffff', endColorstr='#000000'); background-image: -webkit-linear-gradient(top, #ffffff, #000000); background-image: -moz-linear-gradient(top, #ffffff, #000000); background-image: -o-linear-gradient(top, #ffffff, #000000); background-image: -ms-linear-gradient(top, #ffffff, #000000); background-image: linear-gradient(top, #ffffff, #000000); } |
元素过渡效果 Transition
CSS3 的过渡使用起来更加麻烦,你必须最大化的支持各种浏览器,因此你需要定义 5 个前缀:
|
1 2 3 4 5 6 7 8 9 10 |
.transition(@time: 1s, @prop: all, @ease: ease-in-out){ -webkit-transition: @prop @time @ease; -moz-transition: @prop @time @ease; -o-transition: @prop @time @ease; transition: @prop @time @ease; } #demo{ .transition(0.6s,color,linear); } |
编译后的CSS:
|
1 2 3 4 5 6 |
#demo { -webkit-transition: color 0.6s linear; -moz-transition: color 0.6s linear; -o-transition: color 0.6s linear; transition: color 0.6s linear; } |
变形 Transform
|
1 2 3 4 5 6 7 8 9 10 11 |
.transform (@rotate: 90deg, @scale: 1, @skew: 1deg, @translate: 10px) { -webkit-transform: rotate(@rotate) scale(@scale) skew(@skew) translate(@translate); -moz-transform: rotate(@rotate) scale(@scale) skew(@skew) translate(@translate); -o-transform: rotate(@rotate) scale(@scale) skew(@skew) translate(@translate); -ms-transform: rotate(@rotate) scale(@scale) skew(@skew) translate(@translate); transform: rotate(@rotate) scale(@scale) skew(@skew) translate(@translate); } #demo { .transform(5deg, 0.5, 1deg, 0px); } |
编译后的CSS:
|
1 2 3 4 5 6 7 8 |
/* Compiled CSS*/ #demo { -webkit-transform: rotate(5deg) scale(0.5) skew(1deg) translate(0px); -moz-transform: rotate(5deg) scale(0.5) skew(1deg) translate(0px); -o-transform: rotate(5deg) scale(0.5) skew(1deg) translate(0px); -ms-transform: rotate(5deg) scale(0.5) skew(1deg) translate(0px); transform: rotate(5deg) scale(0.5) skew(1deg) translate(0px); } |
镜像效果Reflect
CSS3 中的镜像效果只支持webkit浏览器
|
1 2 3 4 5 6 7 |
.reflect (@length: 30%, @opacity: 0.2){ -webkit-box-reflect: below -40px -webkit-gradient(linear, left top, left bottom, from(transparent), color-stop(@length, transparent), to(rgba(255,255,255,@opacity))); } #demo{ .reflect (10%, 0.2); } |
编译后的CSS:
|
1 2 3 |
#demo { -webkit-box-reflect: below -40px -webkit-gradient(linear, left top, left bottom, from(transparent), color-stop(10%, transparent), to(rgba(255, 255, 255, 0.2))); } |
三角形 Trangle
5个参数:宽度,颜色(上、右、下、左)
|
1 2 3 4 5 6 7 8 9 10 11 12 |
.trangle(@width: 8px, @pram1: transparent, @pram2: transparent, @pram3: transparent, @pram4: transparent){ width: 0; height: 0; border-style: solid; border-width: @width; border-color: @pram1 @pram2 @pram3 @pram4; } //效果如图 #demo{ .trangle(20px, #000, transparent, transparent, transparent) } |
编译后的CSS:
|
1 2 3 4 5 6 7 |
#demo { width: 0; height: 0; border-style: solid; border-width: 20px; border-color: #000000 transparent transparent transparent; } |
颜色计算-互补色方案 Complementary Color Scheme
LESS 和 Sass 最独特的功能就是颜色计算函数,你可以轻松使用 LESS 来创建各种调色板。
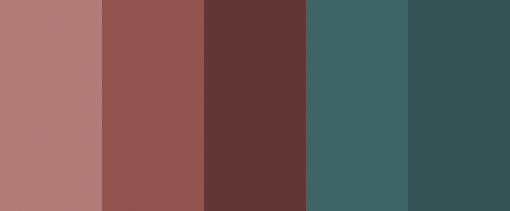
这里我们使用一个基本色,然后通过彩色旋转以及加亮和变暗方法扩展到5个不同色板。为了生成互补色,我们使用 spin 将颜色旋转 180 度:
|
1 2 3 4 5 6 7 8 9 10 11 12 13 |
/* Mixin */ @base: #663333; @complement1: spin(@base, 180); @complement2: darken(spin(@base, 180), 5%); @lighten1: lighten(@base, 15%); @lighten2: lighten(@base, 30%); /* Implementation */ .one {color: @base;} .two {color: @complement1;} .three {color: @complement2;} .four {color: @lighten1;} .five {color: @lighten2;} |
生成的 CSS:
|
1 2 3 4 5 6 |
/* Compiled CSS */ .one {color: #663333;} .two {color: #336666;} .three {color: #2b5555;} .four {color: #994d4d;} .five {color: #bb7777;} |
颜色计算-颜色微调 Subtle Color Scheme
互补色很有用,但在网页设计中另外一个更有用的就是颜色微调:
|
1 2 3 4 5 6 7 8 9 10 11 12 13 |
/* Mixin */ @base: #663333; @lighter1: lighten(spin(@base, 5), 10%); @lighter2: lighten(spin(@base, 10), 20%); @darker1: darken(spin(@base, -5), 10%); @darker2: darken(spin(@base, -10), 20%); /* Implementation */ .one {color: @base;} .two {color: @lighter1;} .three {color: @lighter2;} .four {color: @darker1;} .five {color: @darker2;} |
生成的 CSS:
|
1 2 3 4 5 6 |
/* Compiled CSS */ .one {color: #663333;} .two {color: #884a44;} .three {color: #aa6355;} .four {color: #442225;} .five {color: #442225;} |
文本折行 Wrap
如英文或数字过长的换行显示
|
1 2 3 4 5 6 7 |
//用于显示内容折行 .wrap{ text-wrap: wrap; white-space: pre-wrap; white-space: -moz-pre-wrap; word-wrap: break-word; } |
透明度 Opacity
|
1 2 3 4 5 |
.opacity(@opacity){ @opa: (@opacity*100); filter: alpha(opacity=@opa); opacity: @opacity; } |
inline-block
|
1 2 3 4 5 6 7 8 9 10 |
.ib{ display: inline-block; *zoom:1; vertical-align:top; // font-size:0;/* 所有浏览器 */ // *word-spacing:-1px;/* IE6、7 */ // letter-spacing:-5px; Safari 等不支持字体大小为 0 的浏览器, N 根据父级字体调节 // letter-spacing: -4px;/*根据不同字体字号或许需要做一定的调整*/ // word-spacing: -4px; } |
文本隐藏 Hide
|
1 2 3 4 5 6 |
.text-hide{ display:block; font-size:0; text-indent:-99999em; color:transparent; } |
小结
通过以上的这些技巧,相信以后再写CSS的过程中会轻松很多,而且利用CSS3也使网站变得更美观。
如果你不打算用LESS,sublime的Emmet也提供了类似功能,链接地址。
当然了这只是一部分,刚开始写网页的时候,记得要先将样式重置了,下面是具体的代码
样式重置 reset.less
|
1 2 3 4 5 6 7 8 9 10 11 12 13 14 15 16 17 18 19 20 21 22 23 24 25 26 27 28 29 30 31 32 33 34 35 36 37 38 39 40 41 42 43 44 45 46 47 48 49 50 51 52 53 54 55 56 57 58 59 60 61 62 63 64 65 66 |
@charset "utf-8"; /* CSS Document */ /* Theme Name: xuanfeng Date:2013/10/01; Version:2.0; */ html, body, div, span, applet, object, iframe, h1, h2, h3, h4, h5, h6, p, pre, a, abbr, acronym, address, big, cite, code, del, dfn, em, img, ins, kbd, q, s, samp, small, strike, strong, sub, sup, tt, var, b, u, i, center, dl, dt, dd, ol, ul, li, fieldset, form, label, legend, table, caption, tbody, tfoot, thead, tr, th, td, article, aside, canvas, details, embed, figure, figcaption, footer, header, hgroup, menu, nav, output, ruby, section, summary, time, mark, audio, video { margin: 0; padding: 0; border: 0; font-size: 100%; font: inherit; vertical-align: baseline; } /* HTML5标签初始化 --------------------------------------------------*/ article, aside, details, figcaption, figure, footer, header, hgroup, menu, nav, section { display: block; } /* 标签初始化 --------------------------------------------------*/ body { line-height: 1; color:#333;font:14px/1.5 "微软雅黑",Arial, Helvetica, Verdana, sans-serif} ol, ul { list-style: none; } blockquote, q { quotes: none; border-left: solid 4px #39c; margin-left: 10px; padding-left: 10px; background: whitesmoke; margin: 10px auto; padding: 6px 10px; color: #666; font-size: 20px; } i{ font-style: normal; font-weight: normal; } blockquote:before, blockquote:after, q:before, q:after { content: ''; content: none; } table { border-collapse: collapse; border-spacing: 0; } a img{ border:0; } h1{ font-size:24px; } h2{ font-size:20px; } h3{ font-size:18px; } h4{ font-size:14px; } h5, h6{ font-size:12px; } a { text-decoration:none; } a:hover { text-decoration:underline; } div{display:block;} /* 解决Google浏览器字体不小于12px的问题 --------------------------------------------------*/ html{ -webkit-text-size-adjust:none;} a:focus { outline:none; } /*让position:fixed在IE6下可用! */ * html,* html body /* 修正IE6振动bug */{background-image:url(about:blank);background-attachment:fixed;} |








这个效果很好,建议可以打包下载,哈哈
嗯、好,当时没没想到这一点,这就上传文件
哈,支持
[…] Less函数技巧:http://www.xuanfengge.com/less-writing-skills-sharing-happy-to-write-css.html […]